7 Christmas crafts for kids
With Christmas right around the corner, it’s time to start thinking about Christmas crafts for kids! Doing crafts are always a fun way to engage kids’ minds and creativity, but adding a Christmas theme is fun and quite timely. Here are a bunch of cool Christmas craft for kids which they can do with their friends and family!
List of Christmas crafts for kids
Paper Christmas trees
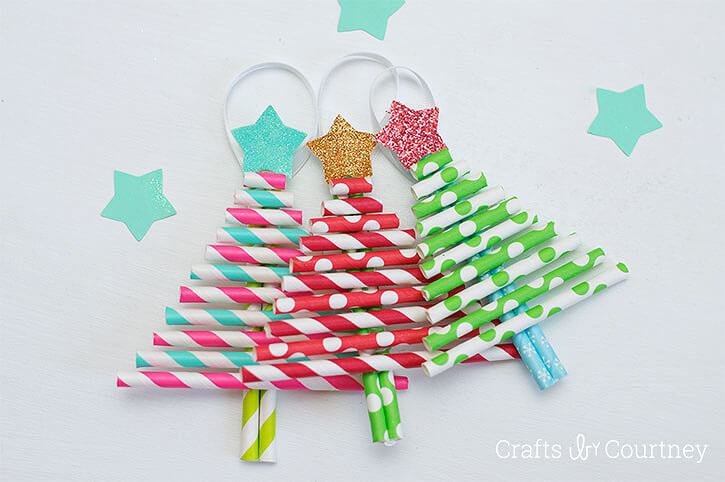
Go green this Christmas with this environmental craft idea! All you need is some hot glue, a ribbon/string and decorative paper straws to make this Christmas tree. As this activity requires the use of a hot glue gun, it’s best to be done under adult supervision.
Instructions:
- Make the back of the tree by gluing 2 straws together
- Now to make the tree, start by cutting a straw about the same width as the back
- Attach the piece onto the back with hot glue, but make sure to leave a little bit of the back showing to attach a star later
- Now make cut the next straw a little longer than the previous one
- Continue until you have your desired length for a tree
- You can always trim your trunk if you think it’s too long
- Cut out a star from some paper and colour it in (or you can use coloured paper)
- Now attach the star to the top of the tree
- Now attach a small ribbon/string to the back of the tree so you can hang it up!
Wreath of pasta
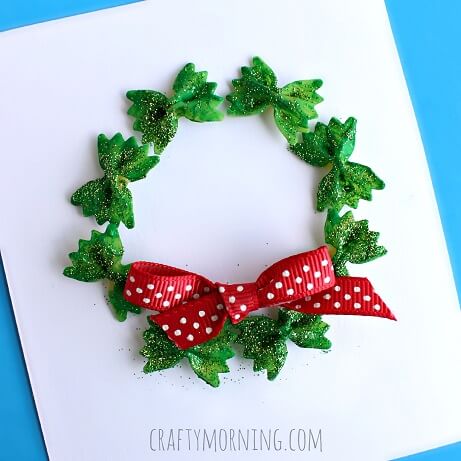
If you’ve got some noodles sitting in your pantry, there’s no better way to use them up than to do a little Christmas craft. This shinning, pasta wreath is perfect as a decoration, or to put on Christmas cards. All you need is some small bowtie-shaped noodles, green paint, glitter, a red ribbon and glue.
Instructions:
- First paint all the noodles green
- Using a paintbrush, brush some PVA glue over the noodles and sprinkle glitter over them
- Now arrange your green noodles in a circle on top of a white paper (or your Christmas card)
- Glue them down!
- You can also add a red ribbon on the bottom for an extra spark
Christmas card ornaments
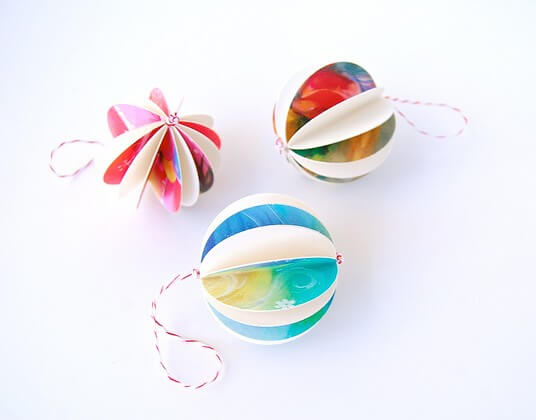
Do you have a lot of leftover Christmas cards from years ago that you don’t know what to do with? Don’t throw them away just yet! Instead, recycle them into awesome ornaments that you can hang around the house. All you need is your old Christmas cards, some glue, scissors and twine/string.
Instructions:
- Cut out lots of circles (try to keep them the same size)
TIP: you can use a circle puncher if you have one
- Fold each circle in half
- Now glue the backs of each half together
- Continue until you get a sphere
- Before you glue the last pieces to make a full sphere, put your twine/string inside it
- Loop the top of the twine/string so you can hang your ornament
- Now glue your last pieces, sealing the string and completing the sphere
- Hang up your ornament for all to see!
Angel paper cups
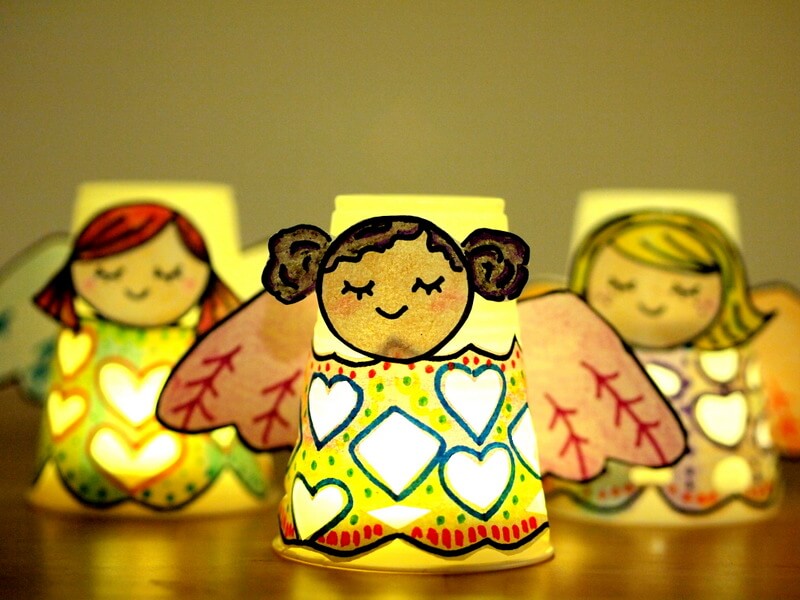
Light up your Christmas with some angels. These cup angels are small, sweet and simple to make. It also serves as a lovely addition to the holiday cheer during the day and lets out a warm glow during the night. All you need to make these angels are some thin plastic cups, decorating pens/markers/crayons, scissors, clear tape and led lights.
Instructions:
- Roll your cup over a sheet of paper and trace it to get a nice curved shape that fits the cup
- Cut it out and trim around 1 inch off the top to leave room for the angel’s face
- Colour in your shape however you like
- Fold your paper like an accordion
- Now cut out some shapes on your paper
- Now open up the paper
- Using your sharpie, add some lines and designs to make it prettier!
- Now you have a pretty angel dress!
- Now grab your sheet of paper again and cut out a face and some wings
- Decorate your wings and face
- Tape your dress, wings and face onto the cup
- Put led lights under each cup to make the angel shine!
Christmas slime
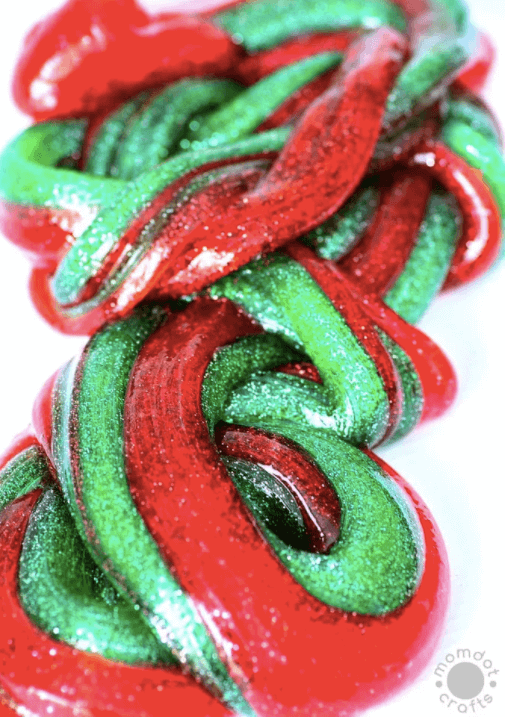
Really feel the Christmas with this slime activity. Let the kids make some slime, but this time, put in some red and green colouring to match with the holiday cheer. All you need is white glue, liquid starch, food colouring and some glitter.
Instructions:
- Pour 150ml of white glue into a disposable cup
- Add a tablespoon of water, glitter and some red food colouring
- Add 1/4 tablespoon of cornstarch mixed with ¼ cup of water
- Mix it all together
- Pour it out of the cup and start kneading
- If the slime is too sticky, add a little bit of starch
- Now repeat the steps but swap out the red food colouring for some green
- Mix your slimes together to create your Christmas slime!
- 1 tablespoon cornstarch
Snowman handprint ornaments
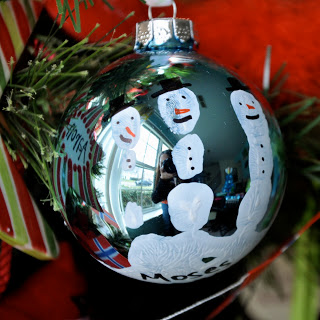
Add your own touch to the Christmas decorations this year with a handprint snowman! This simple activity only requires an ornament, some white paint and coloured markers.
Instructions:
- Paint kids hands white
- Place the ornament in the middle of their palm
- Let them grab the ornament and transfer the paint
- Now with the ‘finger’ region of the paint, use markers to draw a snowman
- On the ‘palm’ of the ornament, you can write something special
- Hang up your ornament for all to see!
Mason jar snow globe
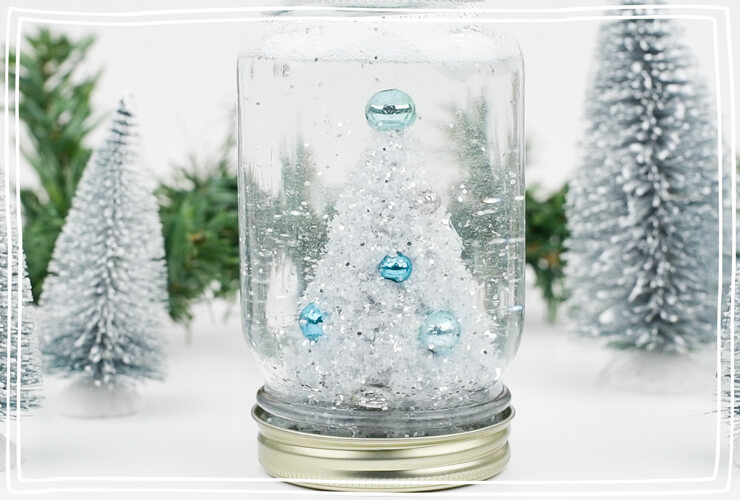
Shake it up this Christmas with a DIY snow globe using a mason jar! All you need is a tree ornament, some glitter, clear glue, warm water, a spoon and mason jar, a glue gun and crafty hands. Since this activity requires a hot glue gun, it’s best to be done under adult supervision.
Instructions:
- Glue the ornament to the lid
- Add clear glue to the jar then stir in some warm water
- Add your glitter and stir again
- Screw on the lid and make sure it’s on tight
- Turn it upside down and watch the snow globe flow!
Here’s a short video with the instructions to watch for some visual aid:
How to Make a Mason Jar Snow Globe
We hope these Christmas crafts for kids have added a little extra cheer to your celebrations! Let us know which craft was your favourite in the comments section down below. Don’t forget to share any Christmas crafts for kids, activities and even traditions of your own.
Interested in keeping kids occupied screen-free at home? Signup to InquiBox and receive a curated set of activities each month delivered to your home.